|
|
 |
|
|
|
|
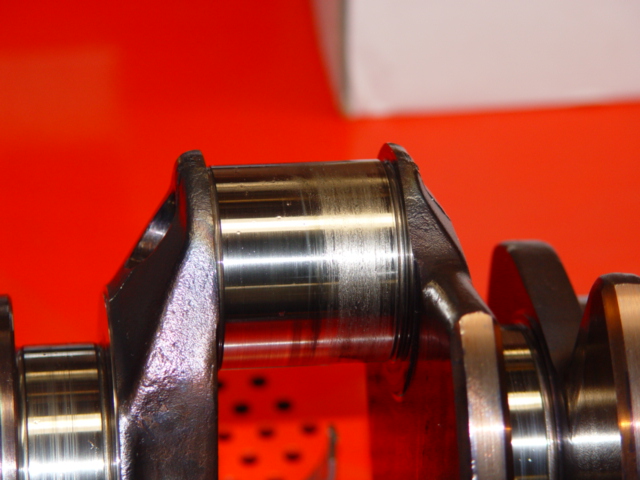
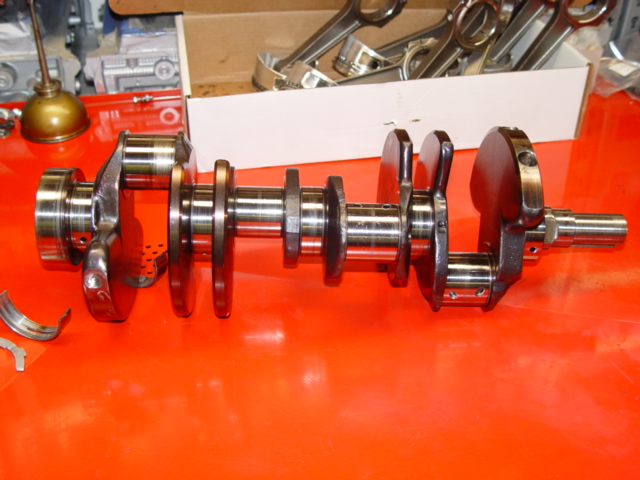
Damaged Crankshaft.....This was a great running engine till
it lost Oil Pressure.
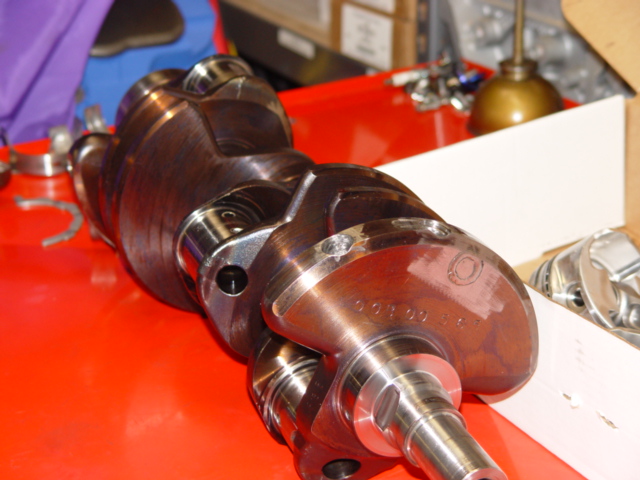
This Crankshaft has gotten very hot...You can see the dis-coloration,
which makes the part britle.
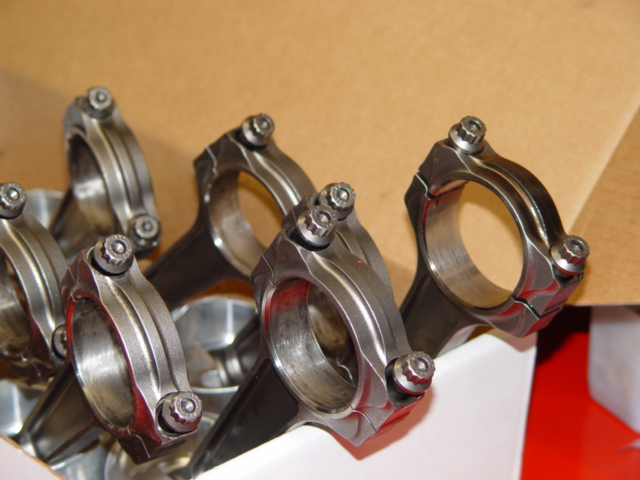
These high dollar Manley I-Beam Rods, have seen much better
days. The caps have gotten so hot they are damaged and dis-colored.
This Engine had a sudden
loss of Oil Pressure, which completely ruined the Engine in seconds.
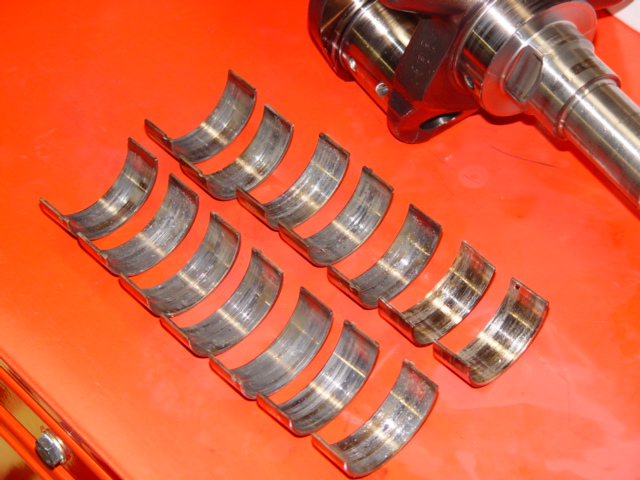
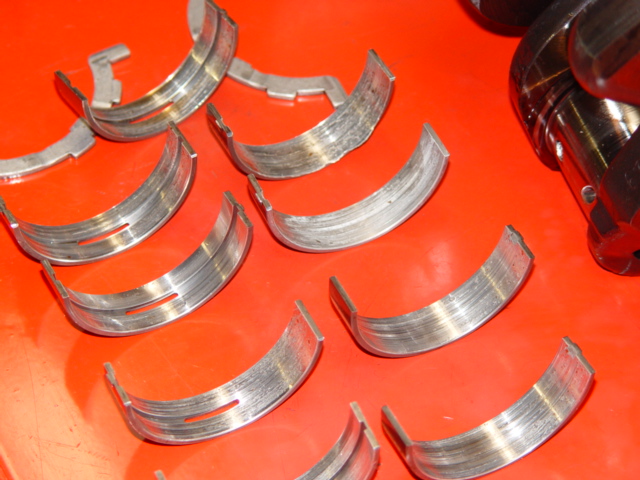
Main Bearing damage..
The Anatomy or the Re-Build This is an article that follows along the engine Re-Build process we take here at ProWeld. The purpose is to share with our customers what it is we do to their engine, and how and why we do
it. This article is not intended to be a tutorial or a step by step detailed engine re-building course, but rather a
inside look at what happen from the time we receive your engine to the time it goes back out the door to be shipped back to
your residence. We start with the arrival of the engine. Most always this happens by a freight
shipper showing up and off loading the engine which has been palletized. Of-coarse before this step, you have already
contacted us, and we have discussed the general needs and wants of your new engine. We have already prepared for you
a written estimate, and you have not only authorized the build, but paid a considerable portion of that estimated bill.
We try very, very hard to keep as close as possible to the original estimate, but it is only an estimate. Because of
flocculating cost, delivery and shipping fees that were estimated and the fact that we really cannot be sure what damage is
done to your engine, until it is apart and evaluated, the final bill is not known till all work is completed. We do
contact you when we receive delivery of your engine, and we also contact you again when we have taken apart and evaluated
your engine. Now back to the article. The engine is delivered and we right away send
you an E-mail telling you it has arrived and what condition it arrived in. Trust me, we have gotten many engines that
were not properly restrained, and arrived up-side down! Hopefully you strapped your engine down tight to the crate,
and made all the arrangements to protect the engine from accidental contact and the weather. All engines should be drained
of all fluids, a catch pan placed under the engine and some absorbent material placed inside to soak-up any miscellaneous
fluid that might escape. The shipper is responsible for all EPA issues, not the trucking company, so make sure you do
your part.
Once we receive the engine, it is wheeled inside and the tear-down process begins. We start every tear-down the same,
and it all starts with pictures, we take pictures of the how the engine arrived, and how it looks. We also take pictures
at various stages of the tear-down, so we can share any problems with you. The engine is mounted on a engine stand,
and the process begins. First any Clutch/Pressure Plate
is removed along with any Flywheel or Flex-Plate.
Everything we remove from your engine is Tagged, and Bagged. We keep all part separated so you get back the same parts
you sent. The Block Numbers are recorded as are the Head Numbers, and when we fill in our record sheet, we log in all
parts. Next comes the Front Dress, all Pullies, Belts, Tensioners, Alternator, AC Compressor and any other gear are removed. Then we remove all Sensors, Switches and Electrical Devices, these are looked over and generally tossed, as we
prefer to install all new hardware, it depends on the build. Now it's time to start at the top and remove all Fuel Injection and Intake Air Supply parts. These are broken down to their lowest level and bagged up. The Exhaust Manifolds or Headers come off next, then we begin work on the Front Cover and Water Pump. These are removed, along with all Timing Gear
underneath, again we bag everything and grade its condition. Now we start on the Cylinder Heads, we remove the Coil
Covers, Valve Covers, all Gaskets and
Seals. Then we take the Valve Train
apart, out comes the Cams, Bearing
Towers, Sprockets and all associated hardware. Next the Heads themselves come off, and we throw away the Head Gaskets
and any Head Bolts, as those are not re-useable. Generally this
is where we start to see the real character of the engine, and any problems that were an issue. No one has ever sent
us a new and perfect running engine, so every engine we tear-down has some sort of issues, some have multiple issues!
With the Cylinder Heads off, we generally take a few more pictures of the
Heads and tops of the Pistons.
The Heads are set aside for the time being, and we are now
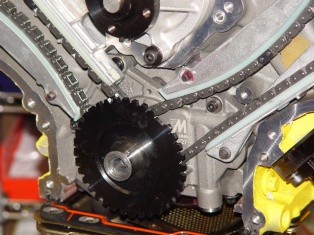
free to get the short block apart. Here we turn the engine over and remove the Oil Pan, it has 16 bolts and generally some metal lying in the bottom. The Gasket goes in the trash, and the pan is set aside, any damage we now see is photographed. Back to the front,
we remove the Bottom Timing Chain
Gear, Timing Wheel and Oil Pump, these are bagged and set aside, though we always toss the Oil Pump, and most of the time, all the Timing Gears and Tensioners. Now everything is off the front of the Block and if the Rear
Seal Plate is removed, we are
free to break the Main Bearing
Cap Studs so they are loss for
later on. Next we Loosen the Rod Bolts, and then each
Rod Cap and one by one, remove each Piston from the Block. These are laid out in the order they are removed,
and once the tear down is completed we will clean, inspect and measure each Piston, Connecting Rod, Main/Rod Journal, Crankshaft, and go over the Block to see what is required for the next build. Eventually, we get back to the Cylinder Heads and remove all the Hardware from each one.
These parts all have to be cleaned, inspected, measured and bagged. By now, we have gotten a pretty good picture of
what happened to your engine and what it's going to take to fix it. The Block will be cleaned, then sent out and re-cleaned, checked for leaks and cracks, and then evaluated by the machine
shop. We will make note of all areas that need work. The Heads, will
also be inspected, if they are in bad shape, meaning over-heated or something bad happened to a cylinder, then they are also
sent out to the machine shop and cleaned, inspected, leak checked and notes made of all expected repairs. The rest of
the engine is also open for review, we generally have the Crankshaft
inspected and checked, but most rotating parts are always replaced, unless they themselves are higher quality parts that can
be serviced.
Once we have time to compile all this data, we contact the owner of the engine and relate all our findings. Once the
owners have been contacted and the final engine design is now known, we order all parts needed and proceed with the engine
machine work. It generally takes 2 weeks for the completion of all machine and balance work, but can take longer during
certain times of the year. In all, we generally take 4 weeks from time of arrival to time to re-ship the completed engine
back to your address. Special order parts can sometimes delay this, but 4 weeks is a good estimate.
Payment: We generally require a 25% deposit at time of contract. Once the engine has arrived and all machine work
is known, we require an additional 50% to continue on, then the remaining bill is due before we ship the engine back
to you. We state this up front, so you and I both know what's expected, with no surprises.
|
|
|
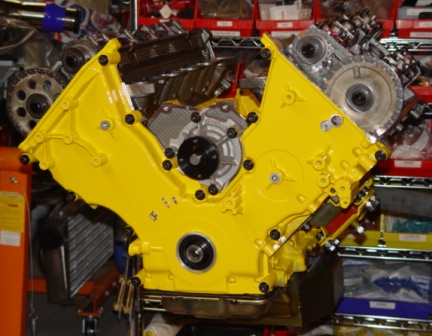
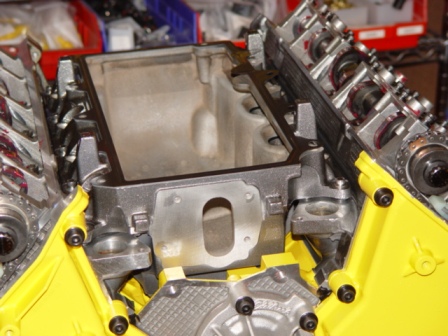
This is a new 4.6L Aluminum Block,
M-6010-46SC. It is getting very hard to find, since they stopped producing them. This one has been painted Yellow,
and not with some rattle can product. We use 2-part Urathane products, generally House of Kolor brand. This and
all blocks painted are first washed, then debured, then cleaned and de-waxed. The non-painted surfaces are masked-off,
and the engine gets its first coat of a primer/sealer, generally three in all. Next comes the under color, as we gennerally
paint with Pearls and Candies. After three coats of Base color, we then spray atleast 3-4 coats of Top coat, followed
by 3 coats of Clear. Generally, those that want the engine painted, also want it matched to a car color.
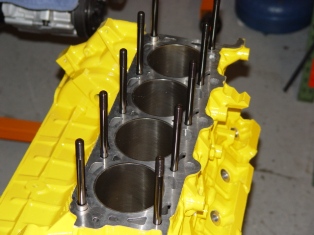
Here the Head Studs have been screwed
in, we use only Ford or APR products.
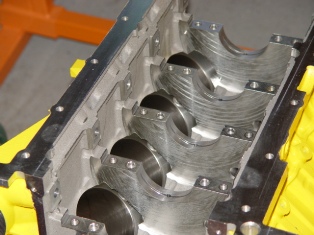
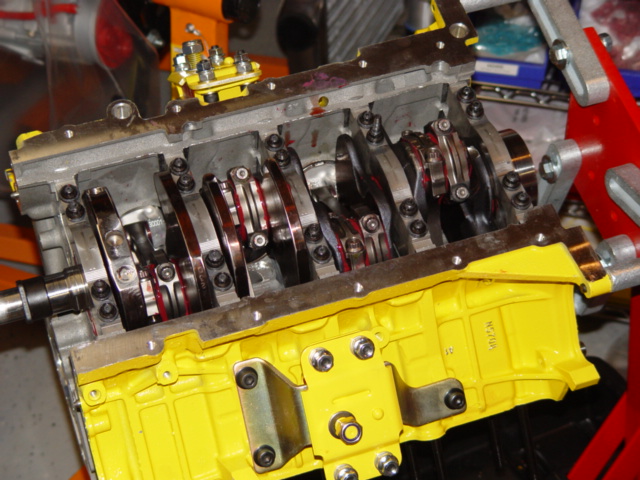
Here you get to see the final assembly of the Crankshaft, the Rods, Pistons, and all Bearings
and Main Studs. While many might just throw these parts together here for the first time, that is not our case.
These parts have already been in and out of this block at least 2-3 times. If you want it right, you have to assemble
the parts, measure, check then re-check. Nothing goes into any engine unless it has been checked and measured for clearance
and fit.
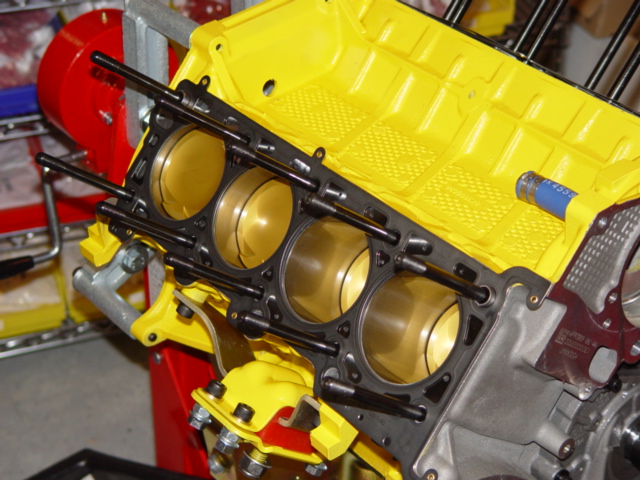
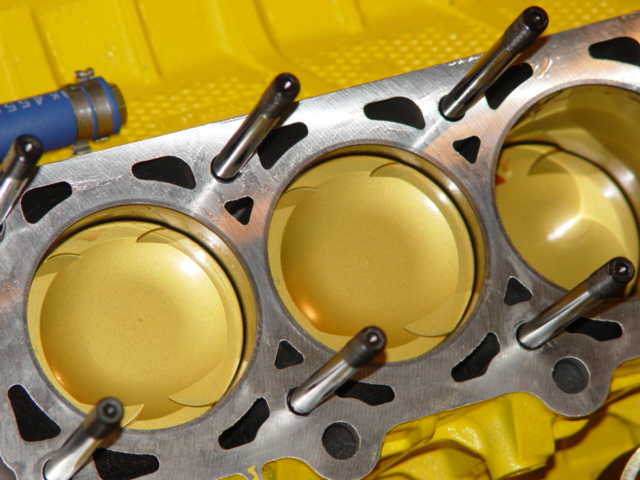
We generally prefer Diamond Pistons....These are a set that have been Ceramic Top Coat and
Valve Reliefs cut into them. You can see the gold like color and the inlets in the top of the pistons. These also
have a Molly side coating, Tool Steel Pins, and Total Seal Piston Rings, with a Gap-Less Second Ring. Yes, every option
cost more money, but it also increases Performance, Durability and Confidence.
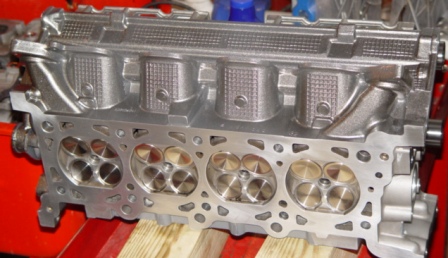
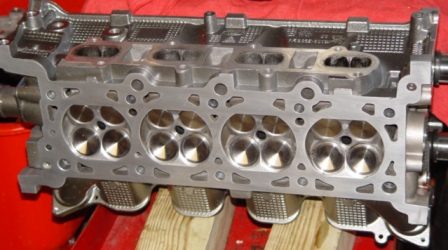
These are 04 Cobra "C" Heads. They have been up-graded with Bronze Valve Guides
and Valve Seats. The Valves themselves are Ferrara Stainless Steel, with a racing back cut to improve flow. The
bowls have been blended and cleaned, while the ports only smoothed and blended as well. Hot the all out treatment, but
exactly what this engine needed, as it is not a Drag Racing Engine, and instead a Road racing one....One that won the 2010
Mustang Challenge, Unlimited Series!
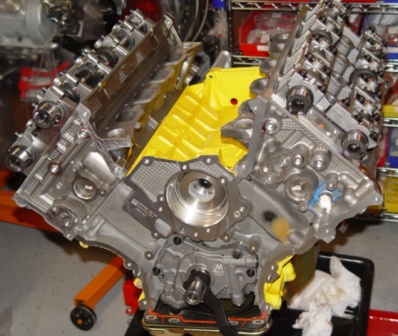
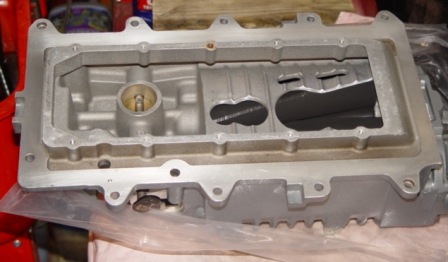
Skipping ahead...The Heads are bolted on, the Melling Oil Pump is installed and primed, the
Oil Pan, a Canton Road Race unit is installed. But before the final bolt-on, we have installed a Windage Tray,
and Oil Pump Pick-up Tube, then checked the clearance from bottom of Oil Pan to Pick-up Tube, and adjusted it necessary.
Miss this step and your new engine might not live to long!
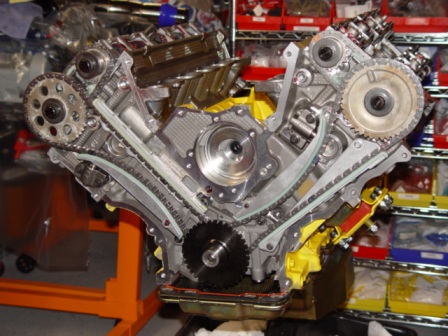
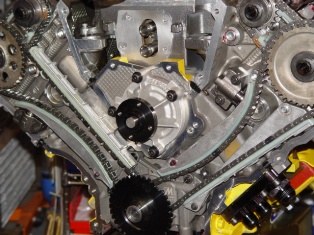
Here the Valve Timing Gears, Chains, Tensioner and Guides are installed. The cams are mechanically timed together by
the series of sprockets and chains, which are then connected to the Crankshaft with more sprockets and chains. This
is the Brain of the engine that keeps everything moving along and in step with one another.
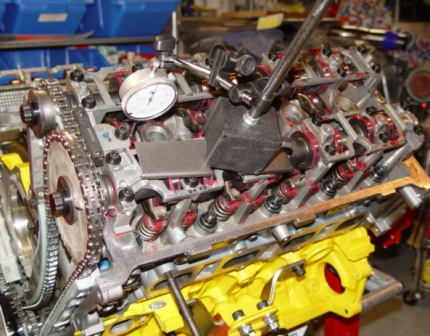
Every Engine gets its timing checked, this is called
Degreeing the Cams or Engine. Yes, you can alien the timing marks and call it a day, but we don't. Way prior
to this, the engine was outfitted with a special Crank Socket and a Degree Wheel was locked onto it. The Engine was
checked for Top Dead Center and all finding were recorded. Once the Heads are installed, we double check that everything
runs free and the cams are in fact the right lift and overlap we wanted. Any final adjustments are made and the front
timing system is torqued down and buttoned up.
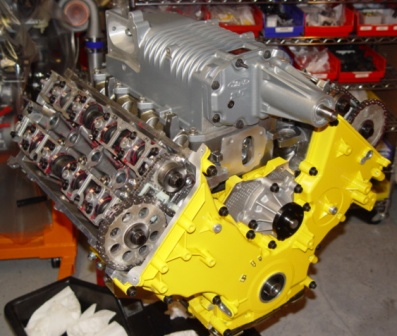
Finally the Front Timing Cover is installed, this one has been painted to match the engine, but
could have been a different or polished finish as well. All our engine get new ProWeld Socket Head Bolts, in Black Oxide
or Stainless Steel, they allow a no compromise fit and easy installation and future removal.
Hear the Supercharger was sent out for rebuild
and Port work. The bottom of the Blower's outlet has been modified for greater flow at increased pressure.
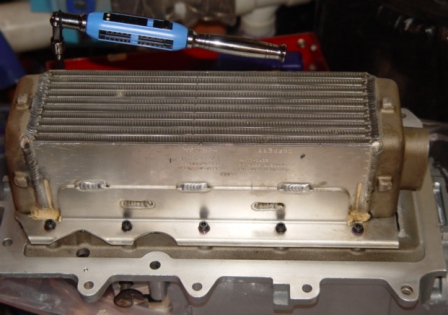
The bottom mounted Inter-Cooler is being installed, we use ProWeld Socket Head Bolts here as well, and Torque everything to
spec.
In these pictures, you see the Lower Intake Manifold
being installed followed by the Super-Charger itself. Again we use Socket Head bolts, and quality Ford Gaskets to seal
the passages. The Water manifold mounted to the very front of the Lower manifold is an absolute essential part of this
package, care has to be taken to proper seal the parts and torque them in place. We generally install our own hose system
on these engine, as most do away with the complicated and low flowing stock Inter-Cooler water system. Here we have
installed our first two section of hose to the manifold, this allows us to easily connect or service the unit later on.
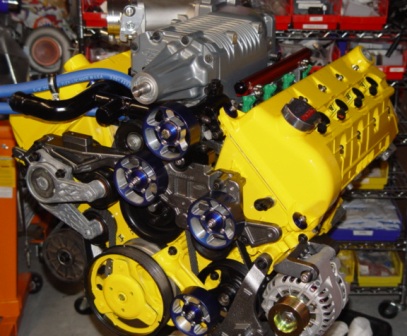
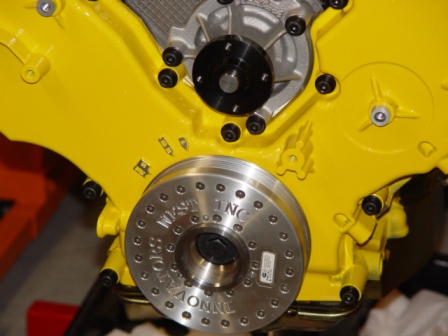 Certainly one of the smartest moves for
any Modular Engine is to improve the Balancer....You can't get much better than an Innovators West product. But
it goes back much further than just that. You see, way back before we ever started assembly on this engine, all the
rotating parts....Crankshaft, Rods, Pistons, Pins, Rings, Locks, Flywheel, and Balancer were sent out for balancing.
They are both static and dynamically balanced, so this engine operates at maximum RPM, with minimum vibration. it is
a true difference you can feel in the seat, but one many miss in the process.
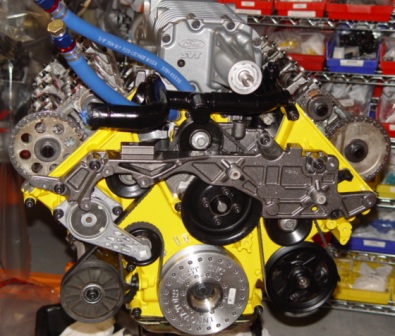
Here we have the Accessory Drive in place and ready to
install the Super-Charger Drive pieces. We take just as much pride in building the inside as the outside. While
some might not care, most of our customers do, and we deliver on every service we offer.
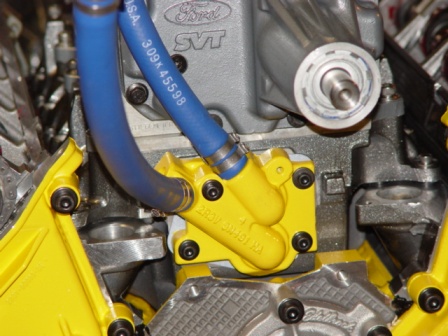
This engine has a unique engine cooling modification made to it. While we did not come up with this arrangement, we
did make it look nice and keep it restrained. Many engine come in with specific modifications made for their particular
situation, as these engines get installed in everything from Mustangs, Hot Rods, Kit Cars and even in a few GT 40's!
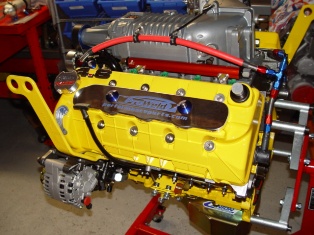
Many customers will ask for a Turn Key Engine...Meaning
they need all system in place like Fuel Ignition and all Sensors and Wiring. Not a problem, we do it all the time.
 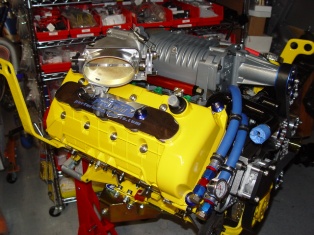
Ready to go! The lifting hooks are on and it's ready to leave the shop.
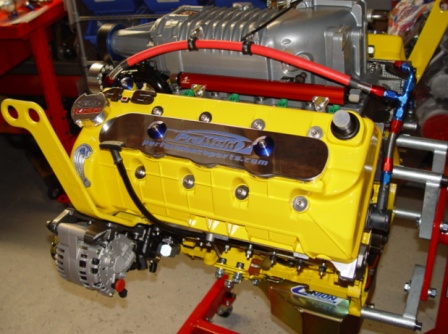
Notice
this engine has our Inter-Cooler Hose System, with both Temperature and Pressure gauge installed and ready for the customer
to continue the system. The biggest gain outside the engine is made in the Inter-Cooler System! To make big power
and keep the supercharger happy and alive, you need increased cooling, this includes larger hoses, better heat transfer and
a larger circulation pump...all items we can deal with.
|
|
|
|
|
|
|
|
|
Pro Weld
5937 Ethan Drive
Burlington, KY 41005
859-586-4069
Proweld@myway.com
|
|
|
|